How to Upload Sql Table to Bit Bucket
Applies to
ApexSQL Pump
Summary
This article explains how to insert data into SQL table in a SQL database using the Insert new import mode feature.
Clarification
ApexSQL Pump has different import data sources and 5 different import modes. In this commodity, the Insert new import mode volition be used and it will show how to add new information to the list from the Excel file, in the existing SQL tabular array which already has some information in it.
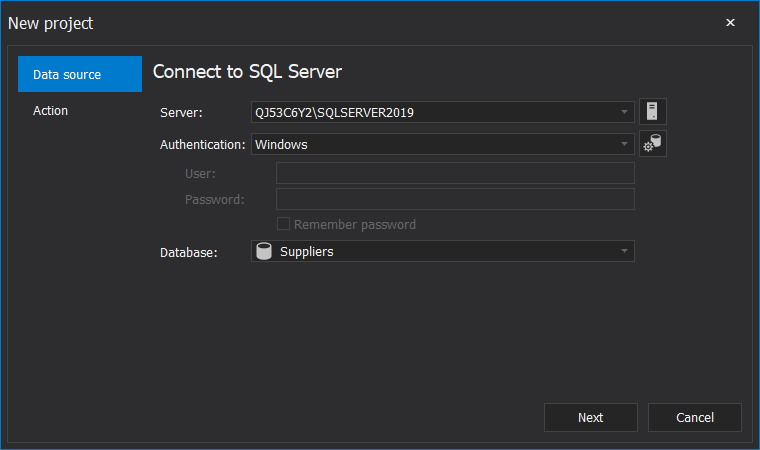
The first step is to setup the connection to SQL Server and chose the desired SQL database which volition be used. In this example the Suppliers SQL database volition be used:
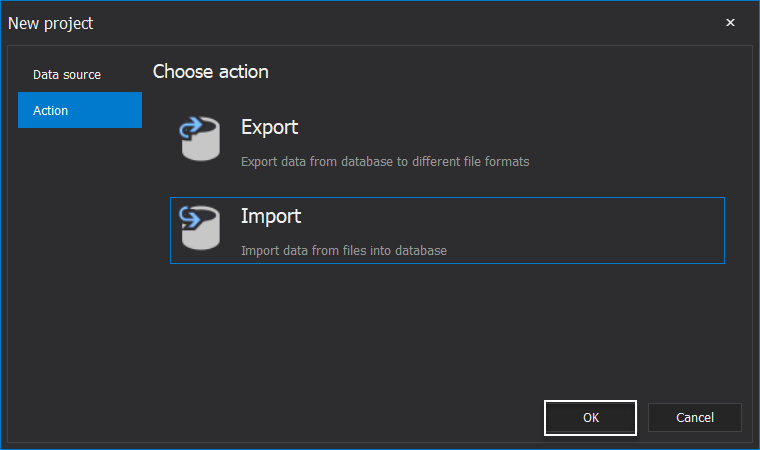
The adjacent step is to select the Import action under the Action tab and click the OK button:
When the SQL database is loaded, the master grid volition exist shown. For the purpose of this commodity the dbo.Employees SQL table will be used and the new data from the Excel file will be inserted into this existing SQL tabular array:

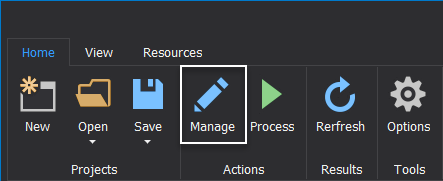
In social club to insert the new data from the Excel file, click the Manage button from the Home tab:
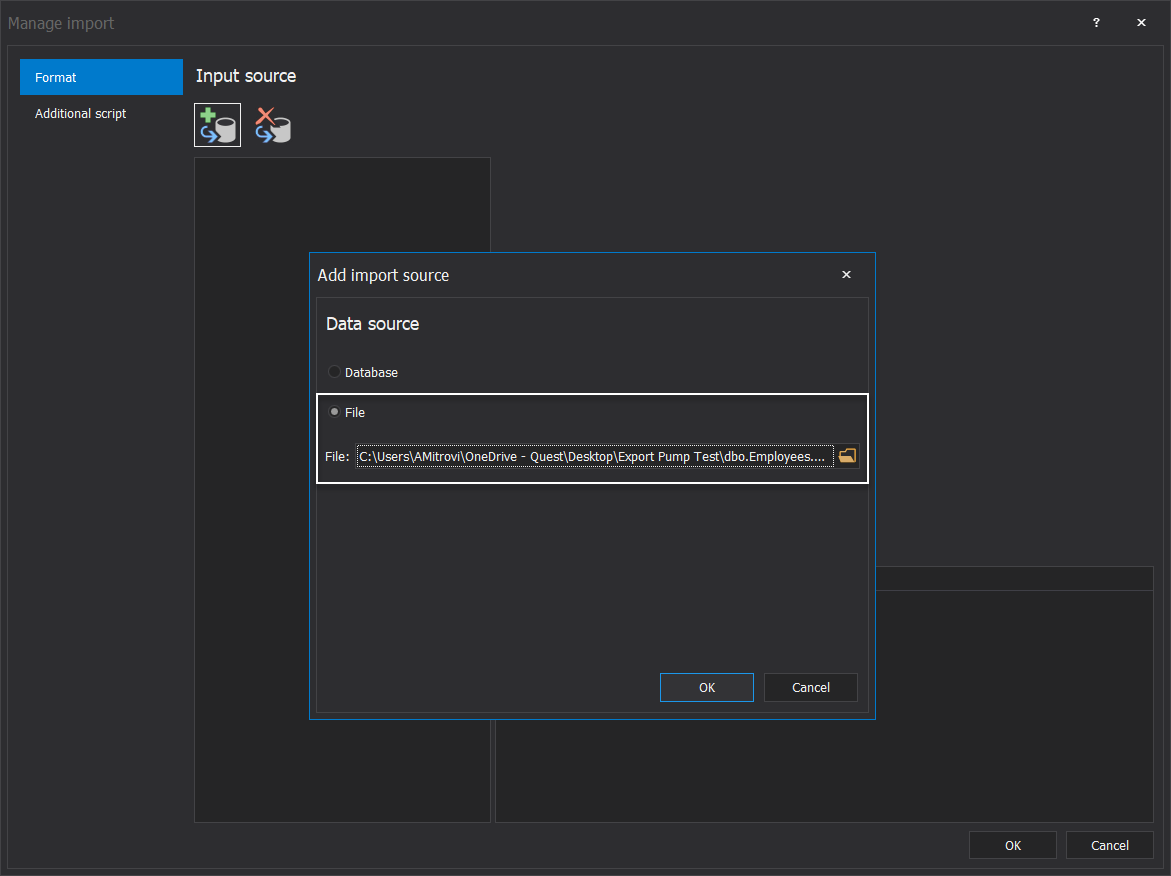
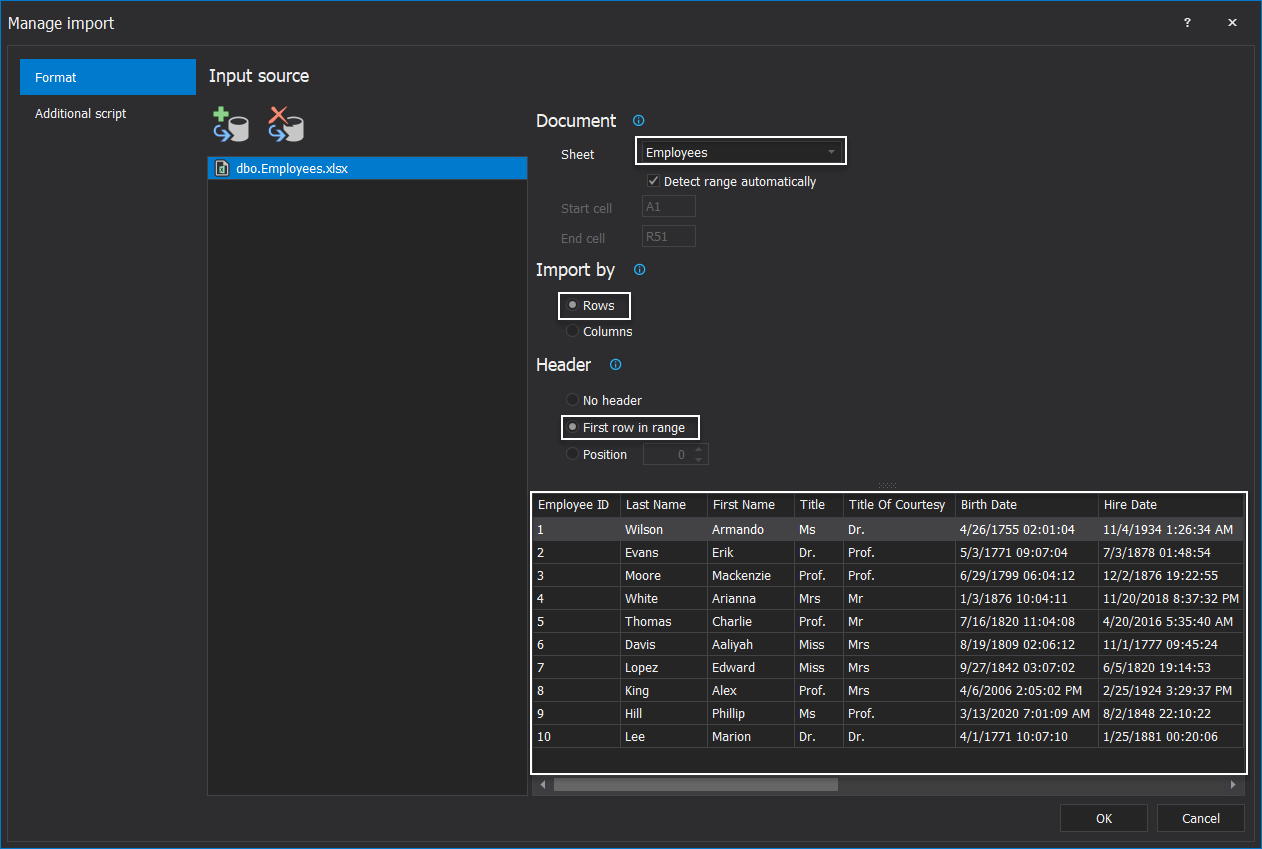
Nether the Manage import window, click the Add button under the Input source header. This volition open the Add together import source dialog in which the File option should exist selected and the Scan button clicked to navigate to the Excel file, in this case dbo.Employees.xlsx , which will exist loaded with the new data:
Before endmost the Manage import window, the additional options, which are loaded on the correct side, will be set. Document canvas is Employees , the Observe range automatically choice is checked, the Import by Rows option is set and nether the Header department the Showtime row in range option is selected. The new data which needs to exist insert into SQL table will be shown:
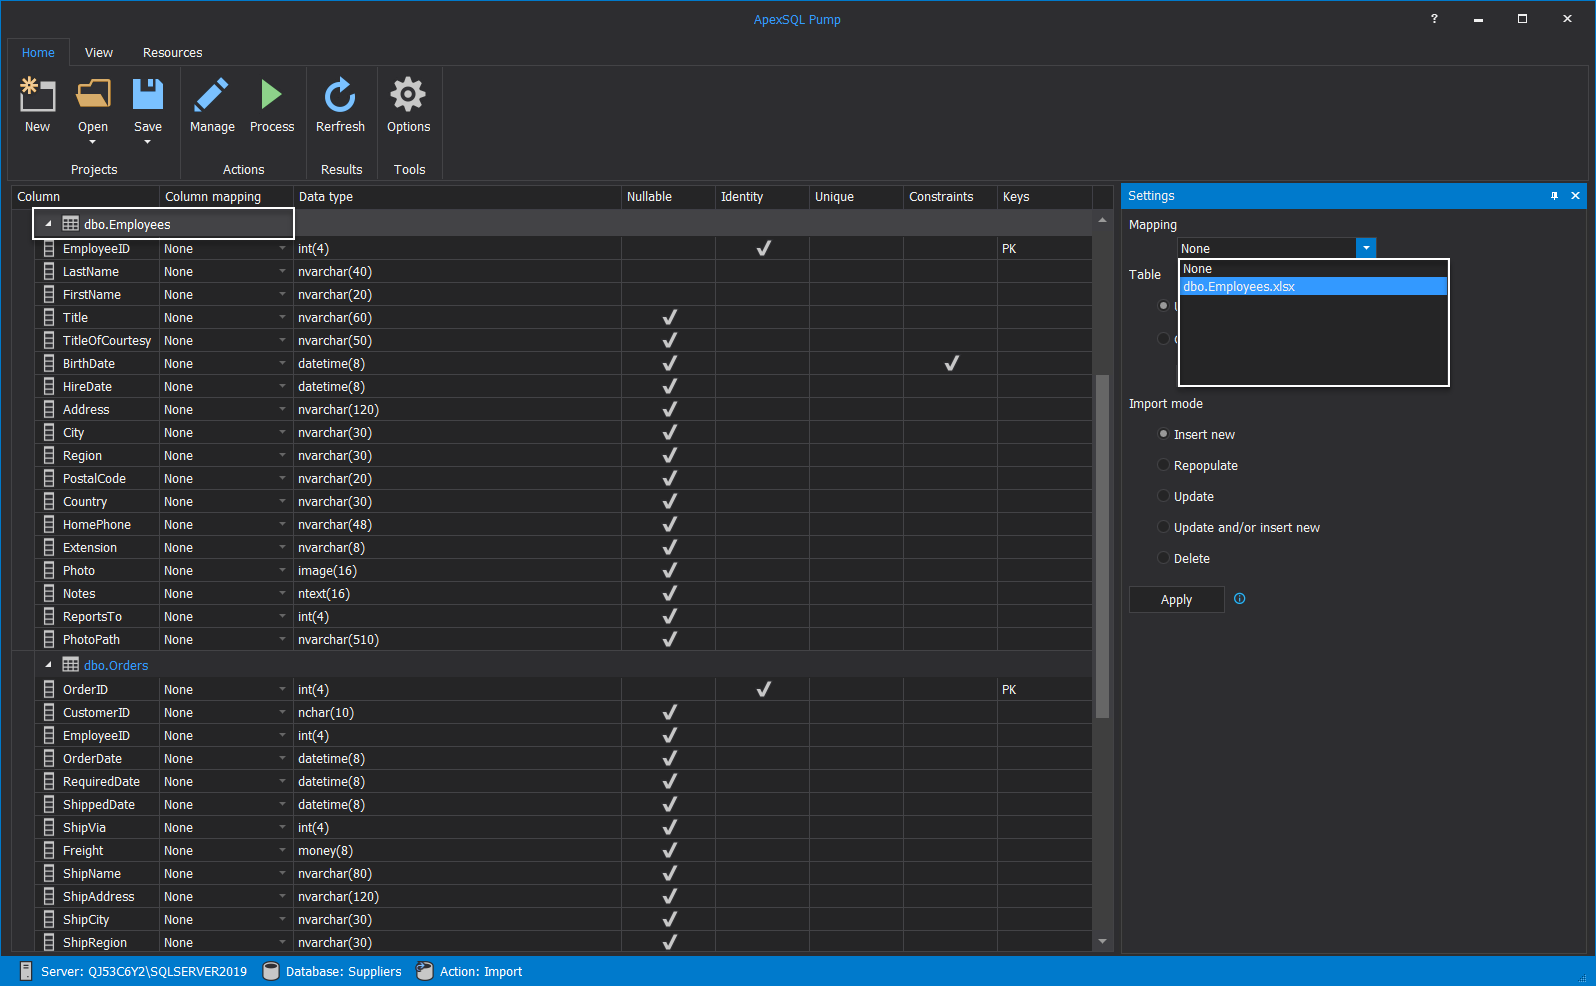
The next step in the main filigree is to select the SQL tabular array, which in this example will be the dbo.Employees SQL table, and then go to the Settings panel which is by default on the correct side of the awarding. Open the driblet-downwards list from the Mapping section and click on the dbo.Employees.xlsx file:
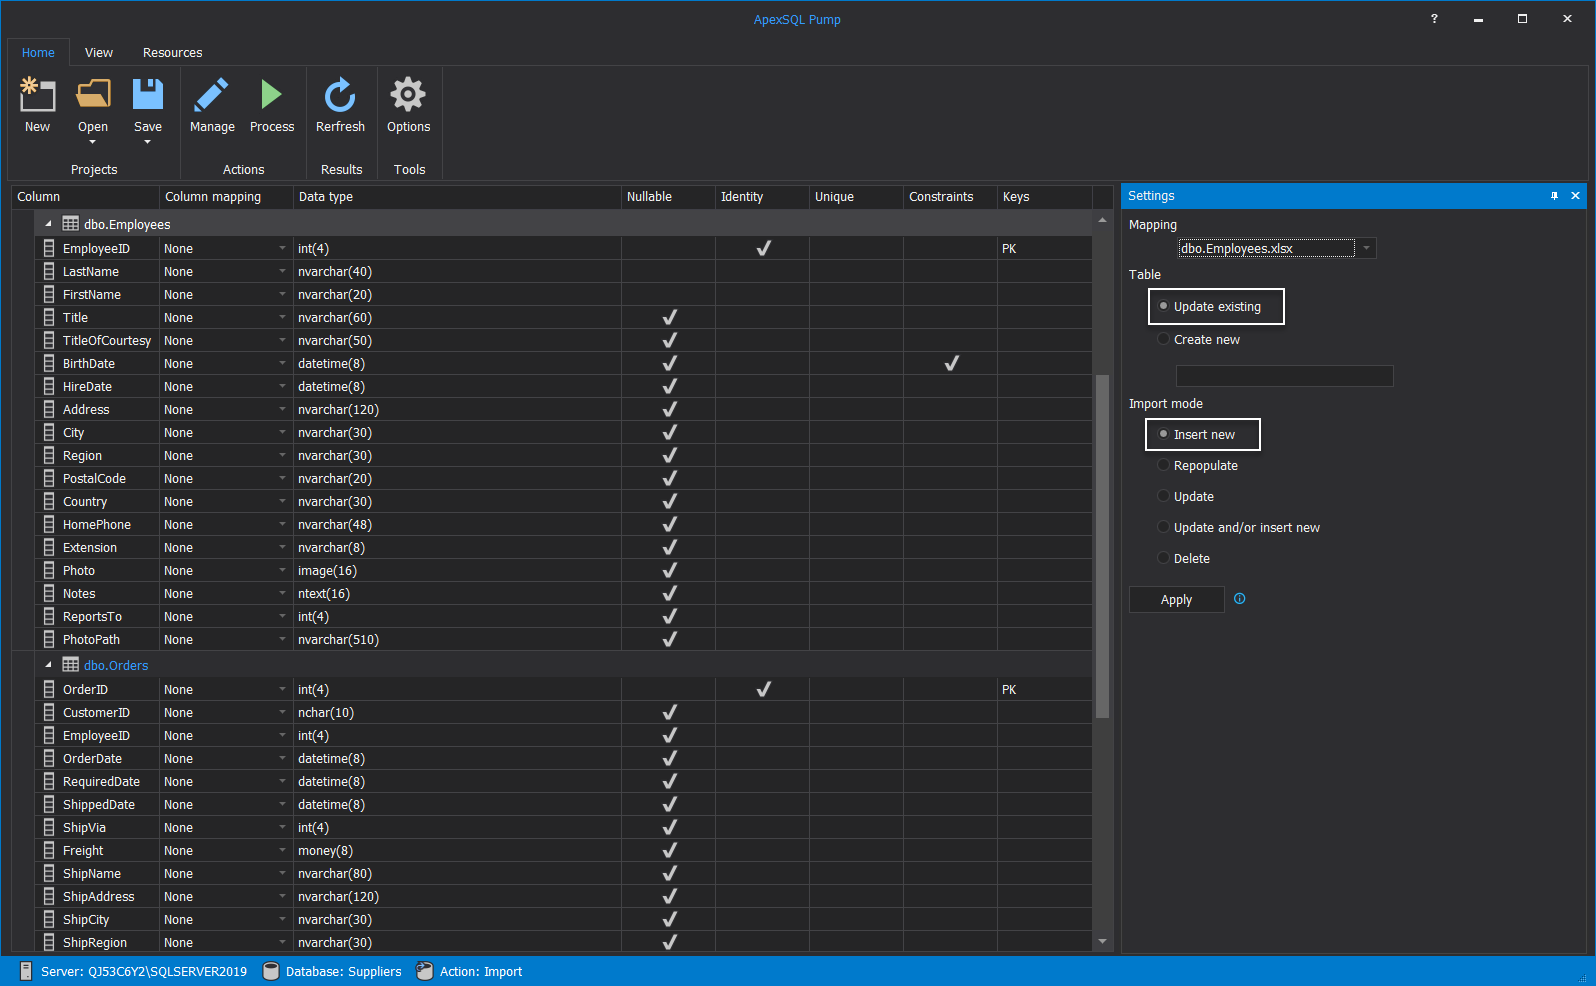
In the Settings console, nether the Table section, select the Update existing option and for Import mode select the Insert new to go on farther to insert information into the SQL table:
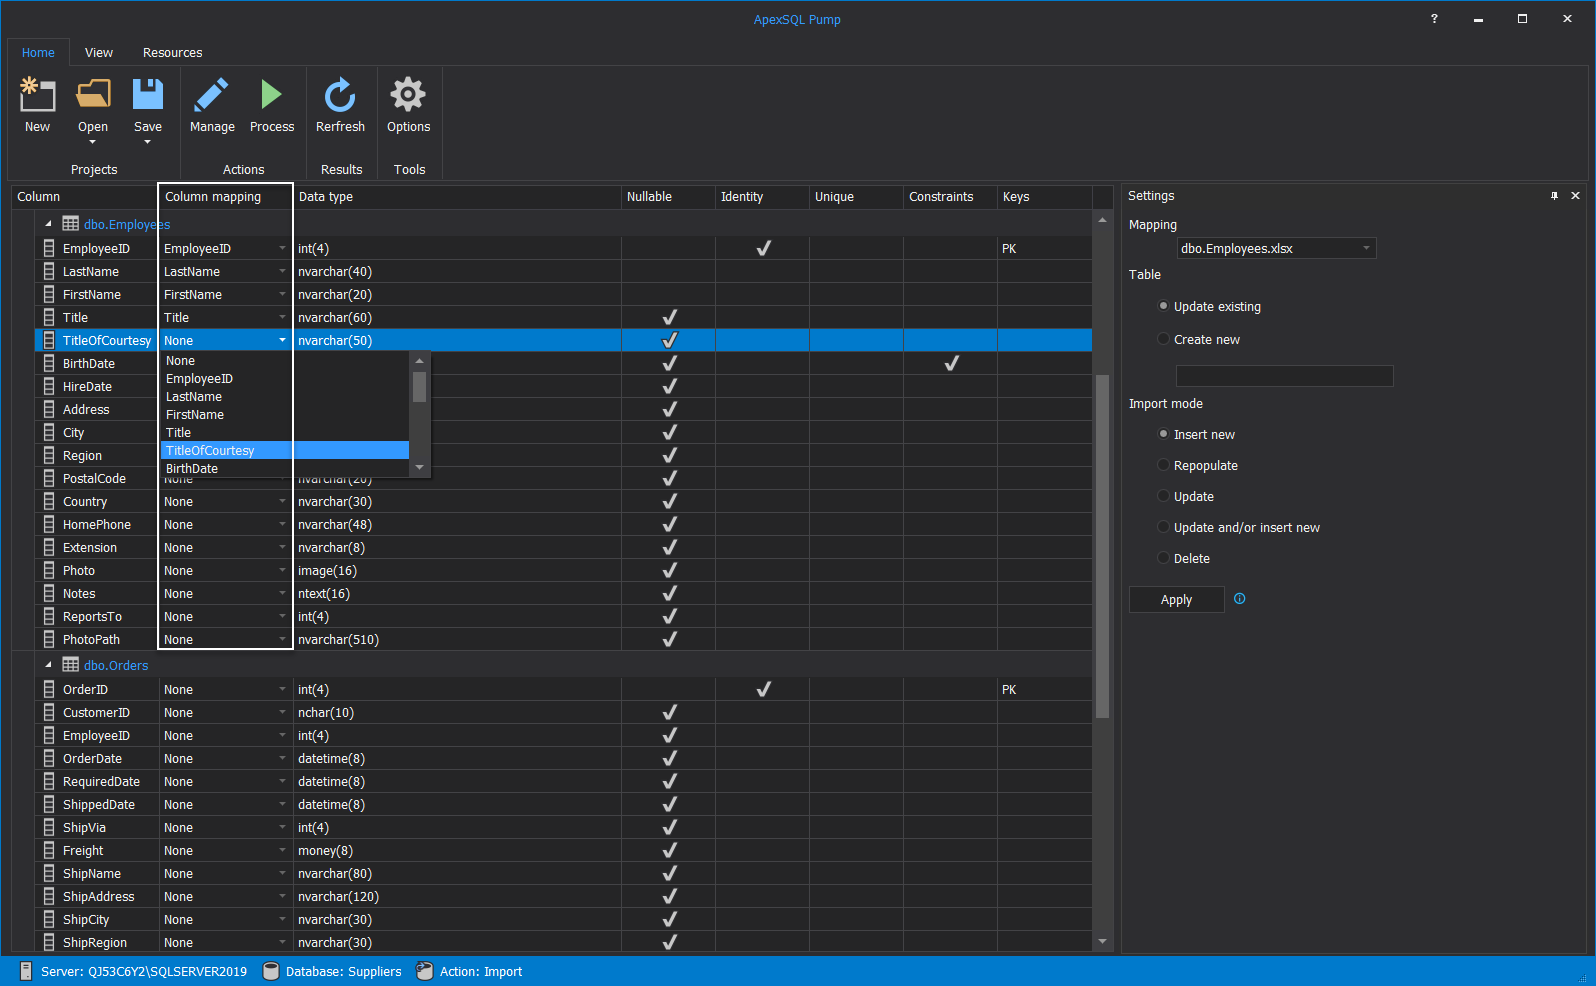
When the options are set in the Settings panel, the remaining thing earlier inserting data is to map the columns under the dbo.Employees SQL table. Click on each column and map it with the corresponding type in the drop-down list nether the Column mapping prison cell:
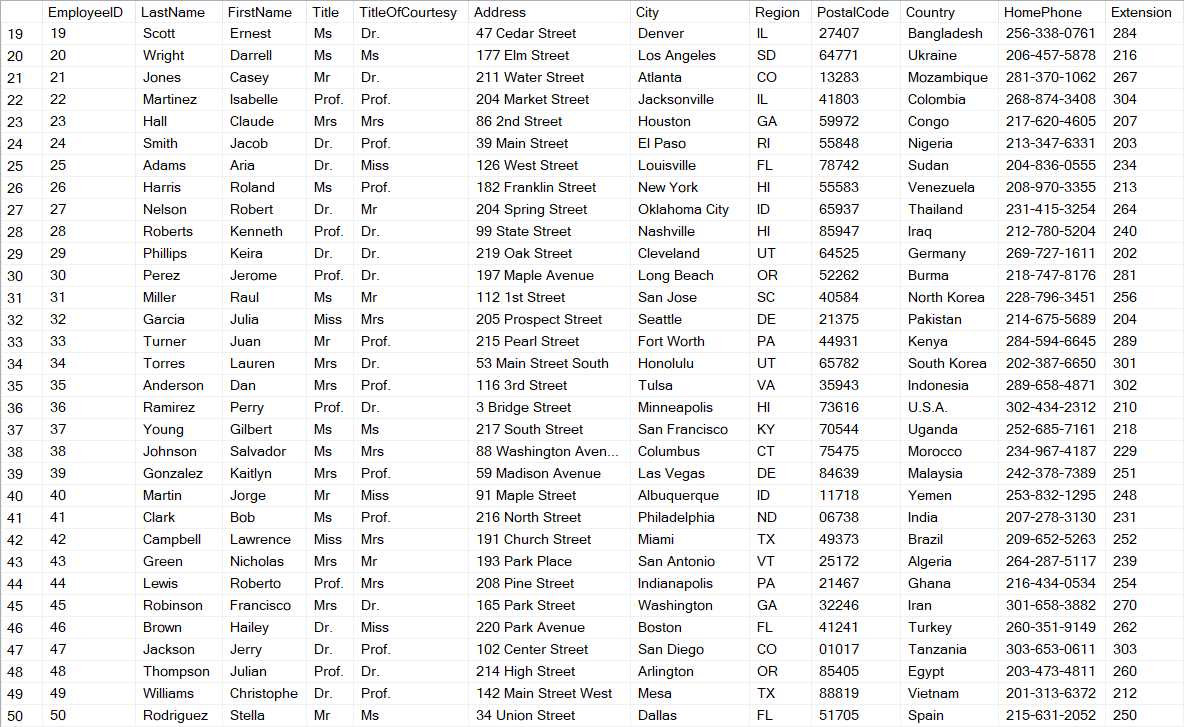
Earlier importing process is finished, current SQL information in the SSMS is shown from the selected SQL table in the SQL database, in this case dbo.Employees SQL tabular array. In the screenshot below at that place are 50 records in the SQL table prior to insert data into SQL tabular array from the Excel file is initiated:
To start the importing process in the ApexSQL Pump, click the Process button from the Home tab. In this instance, the Column mapping will map each column in the selected SQL table and therefore in the Process window information technology volition show that ane SQL table is afflicted including 18 rows:
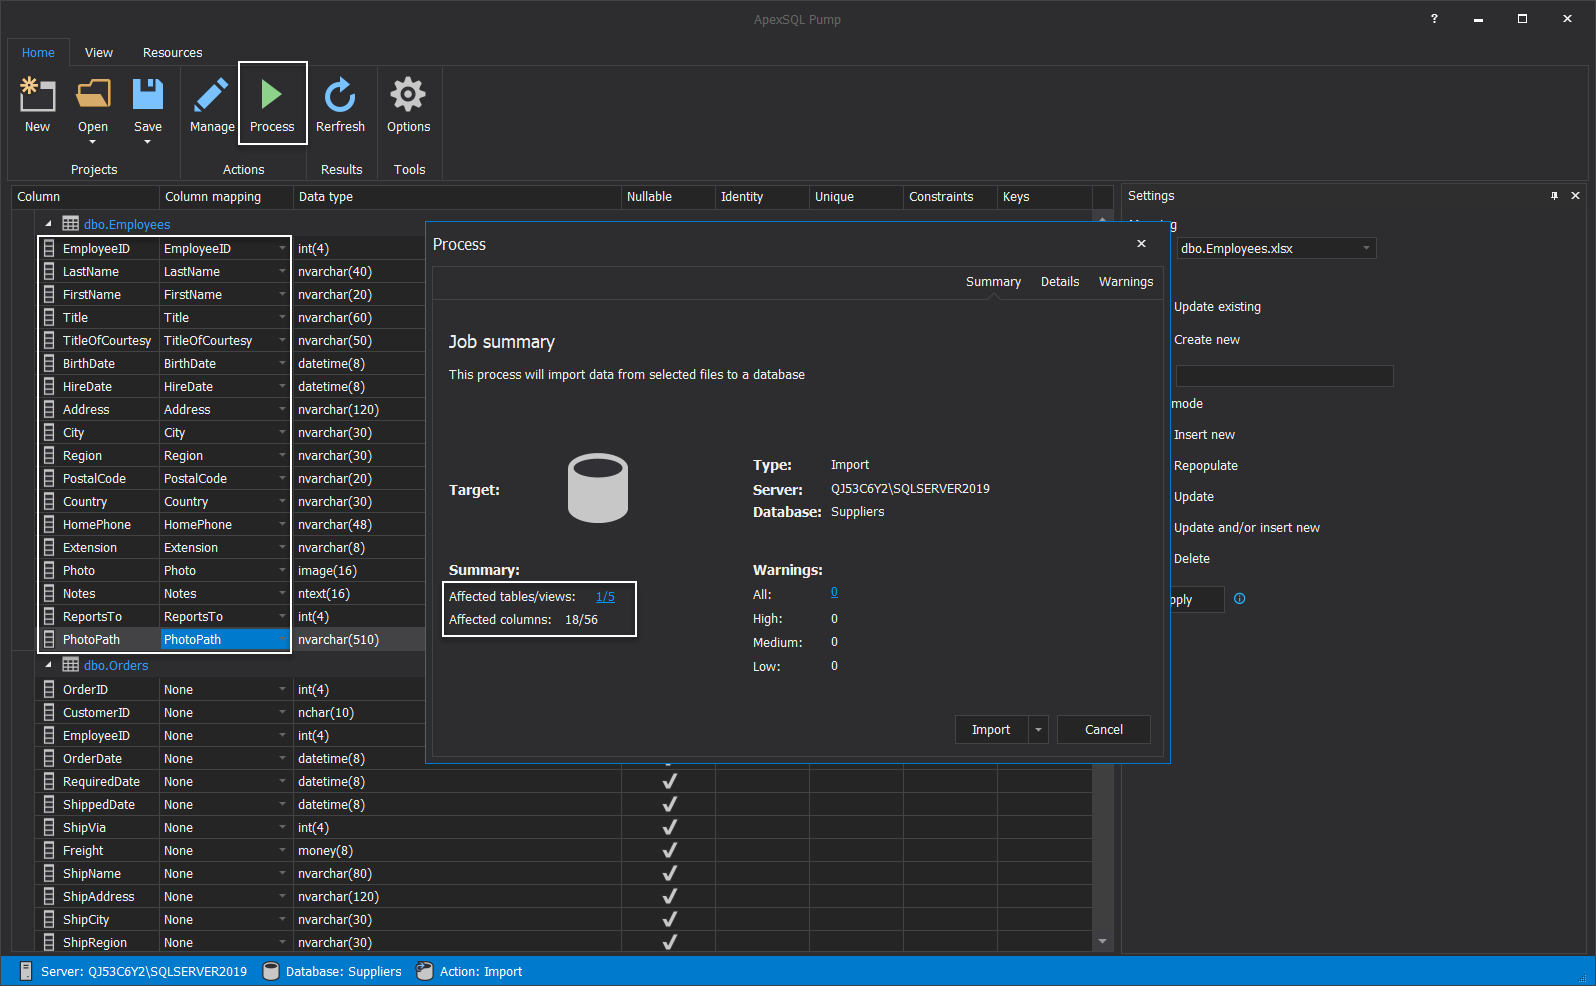
-
Note: When the Column mapping is used, information technology doesn't accept to be used in a way to map each row in the SQL table. If the row is nullable, there is no need to be mapped and it can exist excluded by leaving the None pick.
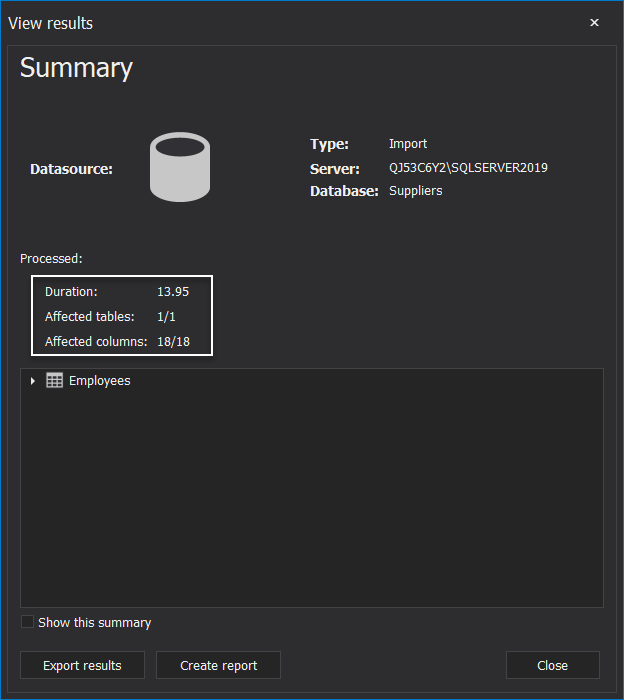
When the Import button from the Process window is clicked, it will offset the importing process. When the process is washed, the View results dialog will be shown where affected tables and columns are shown, and in our case it'due south the previously mentioned SQL table and its 18 columns:
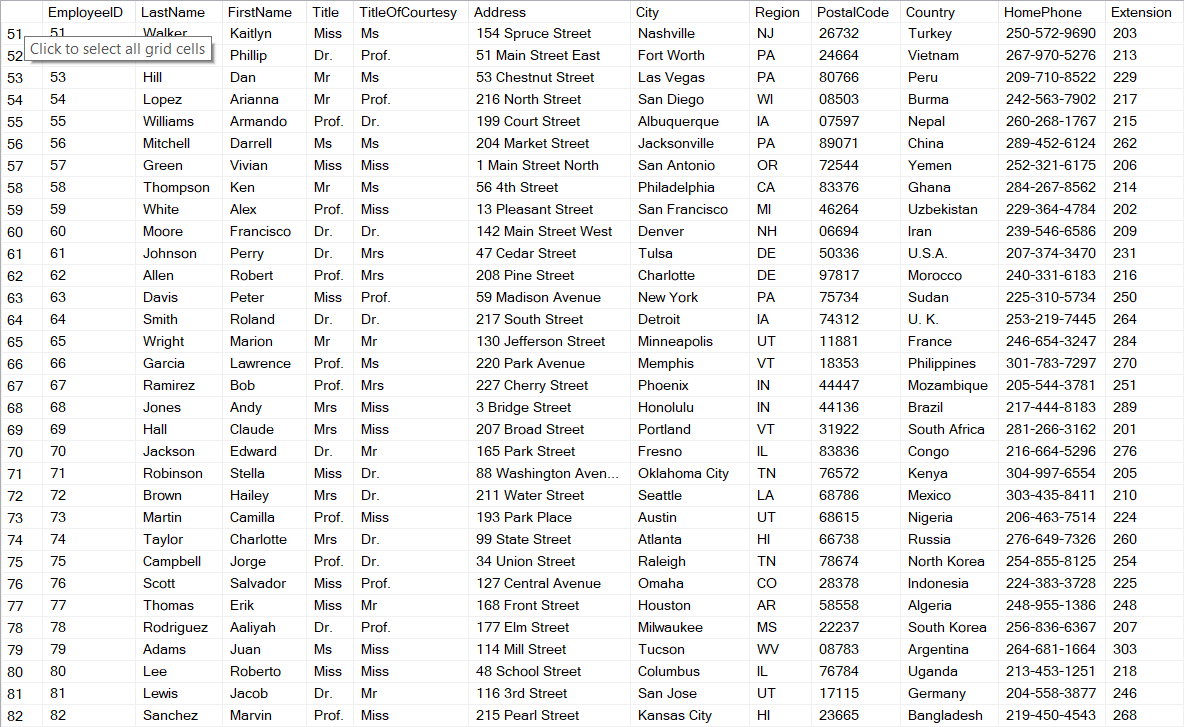
The final results can exist seen in the next screenshot where insert data into SQL table is successfully washed and newly records are added in the SQL table subsequently 50 the existing ones:
Source: https://knowledgebase.apexsql.com/how-to-insert-data-into-a-sql-table-using-the-insert-new-option-in-the-import-mode/
0 Response to "How to Upload Sql Table to Bit Bucket"
Publicar un comentario